Sunday, March 13, 2011

Sweet Pea Stamp Off


I thought I'd shared the card I made for the Sweet Pea Stamps Spring Stamp Off. You can go here if you'd like to vote for your favorite.


I used Spring Witch and colored her with copic markers (including 4 of the NEW shades!!!). The image was actually stamped three times as I layered it to give it a bit of depth. Spring Witch and her kitties are the first layer, the cherry tree is the second layer, and the sky is the final layer. It has a wonderful 3D effect in person but doesn't photograph all that well. *sigh*


The "cherry branches" were made with an SU flower punch and bird punch. For the branches, I punched out branches in brown and in green, cut the leaves off of the green one and glued them on top of the brown ones.

Copic Markers used:

Thursday, December 16, 2010

Rockin' Around the Christmas Tree...

Hi all! I can't believe it's been two months since my last post! Sorry about that! I'll have a few projects to share this week during the final wind-up to Christmas.


Today, I'd like to share the Christmas card I made for my sister and her family. She has two adorable little girls (Hi Anna and Emily!), so when I saw Bah-HuggaBuggs by Tiddly Inks, I immediately added it to my cart to use on her card this year.

The image was printed on Neenah cardstock and colored with copic markers. The snowflakes are assorted Martha Stewart punches which were painted with Smooch Illuminate for some shimmer. The pretty paper is from the Wonderful Winter paper stack by My Minds Eye.

Challenges I participated in with this card:

Stamp with Fun - xmas
Kaboodle Doodles - clean and simple
Pink Elephant - winter wonderland
Digital Tuesday - sparkling Christmas
Creative Card Crew - anything goes
A Spoonful of Sugar - christmas card
Copic Creations - sparkle
Allsorts - last minute Christmas

Thanks for stopping by!

Monday, October 4, 2010

Witching you...

Fall is definitely in the air around here, so I decided to get started on my Halloween projects. For today's card, I used the adorable Betty Belfrey by Tiddly Inks for the focal image.


Isn't she adorable? She reminds me of that old Bewitched episode where Samantha goes back to Salem.


Betty was colored with copic markers, and has silver gel pen on her hat buckle and the metal wrap on her broom. I printed out an extra copy of the broom (with sleeve attached) and popped it up a bit for some dimension. Once the card was assembled, I went over the broom handle and the silver metal areas with some diamond glaze for a bit of extra shine.


My sentiment is from an old SU set, Haunting Halloween. The cobweb in the corner of the image is hand drawn, and was traced with a Sakura stardust gel pen for some shimmer.

Copics used:

Challenges I participated in with this card:

Tiddly Inks - Diamond Glaze
Copic Creations - orange

Monday, September 27, 2010

We'll miss you!

One of my co-workers is losing his job due to his program closing, so we're all pitching in to give him a good send off. He's a real sweet guy who has been a pleasure to work with, so I thought I'd make him a nice cheerful card to show him how much we'll miss him.


I couldn't find an image that fit, so I decided to combine 3 Tiddly Ink images (Bo, Ellie, and Wild Thing) for a "from the group" card.


Before printing, I erased Bo's balloons, and replaced them with some of Ellie & Wild Things' heart balloons so they all matched. After coloring the image with copic markers, I carefully cut out my balloons, and used a bit of silver jewelry wire to make my balloons float above the main image.


Once the card was put together, I used some paper glaze on the balloons to give them that nice shiny finish (which, of course, did not show up well in the photos).

Copic markers used:

Challenges I participated in with this card:

Tiddly Inks - sketch challenge (I rotated it 90 degrees)
Papertake Weekly - animal magic
CES Challenges - animal antics
Charisma Cardz - anything goes

Wednesday, September 22, 2010

Fall is in the Air...

Looking out my craft room window here in upstate NY, I can see the maple tree out front is already painted with red and yellow leaves. It got me in a mood to make a fall card, and what better image is there for a fall card than Tree Hugger by Tiddly Inks?


When I printed the image, I printed a second copy of the leaves on the tree with the plan of popping it up for some dimension. I cut out the 1st (full) image with a circle Nestabilities and left it in the die when I airbrushed the image to get a nice white boarder. I used the copic airbrush system to airbrush the sky, ground and leaves on the full image, and then went back and airbrushed my second set of leaves to match. The second set of leaves was then cut by hand and layered back onto the image with pop-dots. I purposely misaligned the leaves so that some of the bottom layer sticks out and gives a little more dimension.


The orange designer paper is from last fall's Bo Bunny line, I forget the name, sorry. I ran the white side through my Cuttlebug with the Swiss Dots folder to match. The sentiment is a Studio G $1 stamp. The original layout wouldn't fit in a circle (and so would mess with my circle theme, LOL), so I inked up each word with a different color SU marker and stamped them in a more useful (to me) shape.

Copic Markers used:


Challenges I participated in with this card:
Digital Tuesday - It's all about the girls
A Spoon Full of Sugar - anything goes
Midnight Madness - sketch #72
Creative Card Crew - autumn or fall

Thanks for stopping by!

Tuesday, September 21, 2010

The Frog Prince...

The hubby and I celebrated our 5th wedding anniversary on Friday, and I thought I'd share the card I made for him. My hubby likes funny cards, so when I saw Kiss Me by Tiddly Inks, I knew I had found the perfect image to use for his card. Isn't she the cutest?


I wanted to airbrush in the background, so I printed an extra copy of Kiss Me on plain copy paper and cut it out to use as a mask. To get the cloud effect, I cut a cloud shape out of my paper scraps and randomly moved it around my paper while airbrushing. The ground was also airbrushed, but then I went in with my copics to add some grass and flowers. The image itself was colored with copic markers. For the dress, I only colored the sash, and then added a bit of V93 in the corners of the dress for some shadow before filling the whole thing in with Stardust Stickles. I added a bit of gold Stickles to the Frog Prince's crown as well.


The pretty designer paper is from a K&Co Wedding paper pad I got as a gift ages ago. You can't really tell from the photo, but it has a really nice texture to it. In fact, the hubby wanted to know if it was wallpaper. LOL. The purple ribbon was originally white sheer which I airbrushed to match the card. The pretty heart dangle was hand made using some of my beading supplies. I've had those little heart charms for 5+ years, and I think this is the first time I've actually used one.


Oh, yes, this inside of the card. I forgot to take a photo before writing in it, but the greeting printed inside of the card is:
I'm so glad I kissed you!
Happy Anniversary!

The hubby got a good chuckle out of it. :)
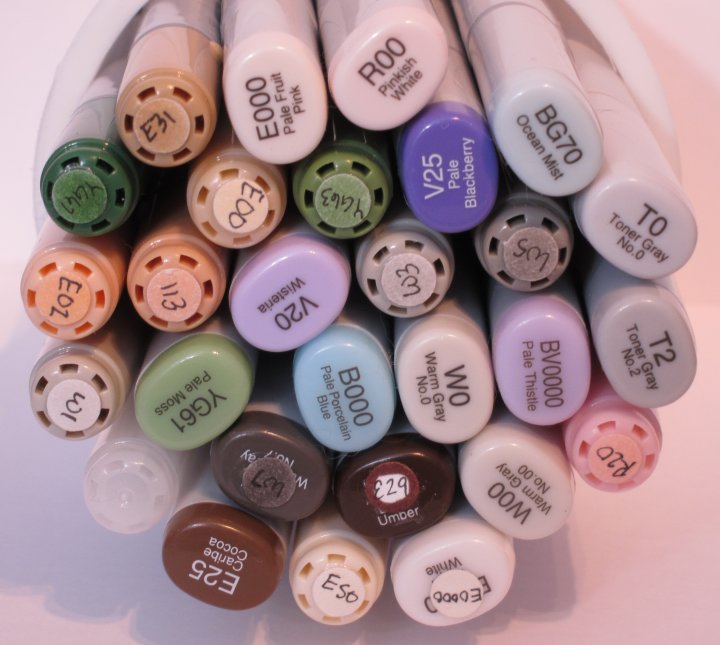
Copic Markers used:


Thanks for stopping by!

Friday, September 17, 2010

Happy Birthday Ryan!

My nephews 2nd birthday is this coming week, so I decided to get a head start on his card. Ryan has a doggie, so I thought the adorable Bo by Tiddly Inks would be perfect for Ryan's card. This week's challenge on the Tiddly Inks challenge blog is all about Our Pets, so this card will do double duty. :)


Bo was colored with copic markers, and has a bit of white gel pen on his eyes to make him pop. I used a little Aleene's Paper Glaze on the balloons and Bo's nose for a bit of shine. When I printed Bo, I printed the balloons separately so that I could layer them on my card.


I wanted to do something a little different, so I decided to go with a shaped card. To make the base, I cut my card stock with the largest Nestabilities Labels 6 die and then folded it in half to make my card base. The patterned paper was cut to match and layered onto the front of the card. 

Copic markers used:


Thanks for stopping by!

Friday, September 10, 2010

Falling leaves, a venture in jewelry making...

*Gasp* I have a non-paper crafting project to share with you today! Can you believe it? LOL.

I got addicted to making jewelry a little over 5 years ago when I was a crazy bride-to-be who fell in love with a gorgeous beaded tiara that was very much out of her price range. Crafty(and stubborn) girl that I am, I promptly taught myself the rudiments of working with wire, beads, and gemstones and made a similar tiara (and necklace, earrings and bracelet) for a fraction of the cost of the one I had been drooling over at the bridal shop. And a new craft addiction was born. LOL.

I haven't pulled out my jewelry kits in a while, but while browsing through a gift shop while on vacation I came across a lovely necklace with fall leaves and berries and immediately started itching to make one for myself. This is the result:


I'm a gold girl, so I used 14k gold filled wire for the project. The "berries" are real seed pearls, and the leaves are all made from lustre glass.

What do you think? I have plans to make a matching bracelet, and maybe some earrings, and will be sure to share them once they are finished.

If you aren't interested in jewelry making, never fear. I have a cute little witch all colored and waiting to be made into a card and will get her up soon!

Monday, September 6, 2010

Welcome baby Emily!

My sister had her second child, Emily, this week, and I was finally able to visit them today!


I've had this adorable image of baby taking a bath in my box of pif's and rak's for a while now, and decided it would be perfect for Emily's card. Isn't she cute? The image was colored with copic markers, and has stardust gellroll pen on the bubbles for a bit of sparkle.


For the card itself, I decided to use some scraps I had leftover from making a name frame for Emily's big sister, Anna, to make a quilted background. The image was cut out with a scalloped square Nestabilities, and hand stitched to a piece of PTI Sweet Blush card stock (I used DMC thread #3713 if you are interested. It is a perfect match for the paper.). The bottom layer was also cut out with a scalloped square Nestabilities, and then run through my Cuttlebug with the Swiss Dots embossing folder. I curled up the edges of the bottom layer before attaching the stitched layer with pop-dots.


Copic markers used:


Challenges I participated in with this card:

Moving along with the Times - in stitches
Craft your Days away - girly n glitter
Stamp Something - Something cute
Paper Play - in stitches
Allsorts - new beginnings

Thanks for stopping by!

Friday, August 27, 2010

Attitude is Everything

Today's project was a special request by a co-worker. One of her dear friends turns 90 today, and she wanted to give her something special to celebrate.The birthday girl in question is one sassy & feisty lady, so I was asked to make a card to suit her personality. Fun, huh?


For my image, Tito-Mosquito on deviantART kindly agreed to allow me to use his drawing, Mari the Flapper. Isn't she fabulous? What could be more perfect for someone who grew up in the roaring 20's than a feisty old flapper who is still flaunting her stuff?


Mari was colored with copic markers, and has clear spica pen over her outfit for a bit of sparkle. I added white Fun Flock to her boa for some textural interest (close-up below). I wanted to use a real feather for her headpiece, but since I couldn't find one in my stash, I substituted a bit of wired white fringe that I airbrushed to match her belt & garter.


Think she'll like it?

Related Posts with Thumbnails
 
Blog design and header created by Melissa Earnest.
Background paper by Pink Petticoat.